Looking to impress your friends and family with the perfect Thanksgiving turkey? Look no further! In this article, we will guide you through the art of perfectly roasting a Thanksgiving turkey. Whether you’re a seasoned chef or a novice in the kitchen, our step-by-step instructions and expert tips will ensure that your turkey comes out juicy, flavorful, and beautifully golden brown. Get ready to elevate your culinary adventure and create a feast that will leave everyone craving for more. So, let’s get started!

Preparation
Preparing a Thanksgiving turkey requires careful attention to detail and a few essential steps to ensure that the end result is a perfectly cooked, succulent bird that will impress your guests. Let’s walk through the important steps of preparing your turkey for roasting.
Choosing the right turkey
When selecting a turkey for your Thanksgiving feast, you have a few options to consider. First, you’ll need to decide between a fresh or frozen turkey. Fresh turkeys are generally more expensive but offer the advantage of not requiring thawing time. On the other hand, frozen turkeys are widely available and can be purchased well in advance.
Next, you’ll need to determine the size of the turkey you need based on the number of guests you’ll be serving. As a rule of thumb, you should plan for about 1 to 1.5 pounds of turkey per person. It’s better to err on the side of a slightly larger turkey to ensure everyone is well-fed and leftovers can be enjoyed.
Lastly, consider whether you want a whole turkey or just specific parts, such as a turkey breast or legs. Whole turkeys are traditional and allow for a beautiful presentation, while individual parts can be more convenient for smaller gatherings.
Thawing the turkey
If you’ve opted for a frozen turkey, it’s crucial to plan ahead and allow enough time for proper thawing. The safest way to thaw a turkey is in the refrigerator. Place the turkey on a tray or in a pan to catch any drips, and allow about 24 hours of thawing time for every 4-5 pounds of turkey. Be sure to keep the turkey in its original packaging while thawing to prevent cross-contamination.
If time is of the essence or you forgot to thaw your turkey ahead of time, you can use the cold water method. Submerge the wrapped turkey in a sink or large container filled with cold water. Change the water every 30 minutes to maintain a safe temperature. Allow about 30 minutes of thawing time per pound of turkey using this method.
Avoid thawing a turkey at room temperature, as this can promote bacterial growth and create a food safety risk.
Cleaning the turkey
Before seasoning or stuffing your turkey, it’s essential to clean it thoroughly to ensure food safety. Start by removing the turkey from its packaging and removing any giblets or neck that may be inside the cavity. Rinse the turkey inside and out with cold water, gently rubbing the skin to remove any debris.
Once the turkey is clean, pat it dry with paper towels. Moisture on the skin can hinder proper browning during roasting, so it’s crucial to get the turkey as dry as possible.
Seasoning the turkey
Seasoning is what turns a regular turkey into a culinary masterpiece. Before adding any seasonings, ensure that the turkey’s skin is completely dry. This will help the seasonings adhere better and create a beautiful crust during cooking.
You can keep your seasoning simple by using a combination of salt, pepper, and garlic powder. Liberally sprinkle the turkey, both inside and out, with the seasoning mixture, ensuring that all areas are well-coated. For an extra burst of flavor, you can add herbs like rosemary, thyme, or sage to the mix.
For those looking for more adventurous flavors, there are countless turkey seasoning recipes available online. From citrus-infused marinades to spicy dry rubs, the options are endless. Whatever seasoning method you choose, be sure to allow the turkey to sit for at least 30 minutes before moving on to the next step. This allows the flavors to penetrate the meat.
Brining the Turkey
Brining is a technique that involves immersing the turkey in a saltwater solution to enhance its juiciness and flavor. Understanding the importance of brining and following the right process can make a world of difference in the final result of your Thanksgiving turkey.
Understanding the importance of brining
Brining works by allowing the turkey to absorb moisture, resulting in a juicier and more flavorful bird. The salt in the brine helps break down proteins in the turkey, allowing it to hold onto more moisture during the cooking process. Brining can also enhance the taste of the turkey by infusing it with the flavors of the brine solution.
Brine recipe and ingredients
To prepare a basic brine, you’ll need the following ingredients:
- 1 gallon of water
- 1 cup of kosher salt
- 1/2 cup of sugar
These measurements can be adjusted depending on the size of your turkey and personal preference. If desired, you can also add aromatics like garlic, onions, herbs, or spices to the brine to further enhance the flavor.
Preparing the brine
In a large pot or container, combine the water, salt, sugar, and any additional aromatics. Stir until the salt and sugar are fully dissolved. If using hot water to speed up the dissolving process, make sure to cool the brine completely before using it.
Brining duration and process
The recommended brining duration for a turkey is around 12-24 hours. The size of your turkey will determine the specific brining time needed. As a general guideline, aim for 1 hour of brining time per pound of turkey. Keep in mind that brining for too long can result in an overly salty bird, so it’s important to monitor the timing.
To brine the turkey, place it in a large brining bag or a clean food-safe container. Pour the prepared brine over the turkey, making sure it is fully submerged. If necessary, you can add additional water to cover the turkey completely. Seal the bag or container and refrigerate, turning the turkey halfway through the brining process if possible.
Once the desired brining time has elapsed, remove the turkey from the brine and rinse it thoroughly under cold water to remove any excess salt. Pat the turkey dry with paper towels before proceeding with the next steps of preparation.

Stuffing the Turkey
Stuffing the turkey is a divisive topic among chefs and home cooks alike. While some consider it a Thanksgiving tradition, others prefer to cook the stuffing separately to ensure even cooking and food safety. Let’s explore the pros and cons of stuffing and help you decide which approach is best for you.
Pros and cons of stuffing
One of the main advantages of stuffing the turkey is the infusion of flavors. As the turkey roasts, juices from the bird soak into the stuffing, resulting in a moist and delicious side dish. Stuffing inside the turkey can also be seen as a space-saving measure, as it eliminates the need for an additional baking dish.
However, there are some drawbacks to consider. The cavity of the turkey is a perfect environment for bacteria to grow, so it’s essential to ensure the stuffing reaches a safe temperature. Cooking the stuffing inside the turkey can also extend the cooking time, potentially leading to overcooked meat. Additionally, stuffing the turkey can make it more challenging to achieve an evenly cooked bird, as the dense cavity can act as an insulator.
Choosing the right stuffing recipe
If you decide to stuff your turkey, it’s important to choose a stuffing recipe that complements the flavors of the turkey. Traditional stuffing recipes typically include a combination of bread, vegetables, herbs, and spices. However, there are countless variations that cater to different tastes and dietary restrictions, such as gluten-free or vegetarian stuffing.
When selecting a stuffing recipe, consider the ingredients you enjoy and the flavors you want to highlight. Classic herb stuffing, cornbread stuffing, or wild rice stuffing are all popular choices. Don’t be afraid to get creative and experiment with different flavors to create a unique and memorable stuffing.
Preparing the stuffing
To prepare the stuffing, start by sautéing any vegetables or aromatics you plan to include, such as onions, celery, or garlic. Once they are soft and fragrant, add any additional ingredients like herbs, spices, or cooked meat. In a separate bowl, combine dry bread cubes or cooked grains with the cooked vegetables and other flavorings. Mix everything together and season it to taste with salt and pepper.
It’s important to note that the stuffing should be moist but not overly wet. The bread or grains should absorb some of the liquid from the other ingredients, but the stuffing should not be soggy. If needed, you can add a small amount of broth or stock to achieve the desired consistency.
Stuffing the turkey
When the stuffing and turkey are prepared, it’s time to stuff the bird. Use a large spoon or your hands to carefully pack the stuffing into the cavity of the turkey. Be sure not to overstuff the turkey, as the stuffing needs room to expand during cooking. Leave some space to allow for airflow and even cooking.
Once the turkey is stuffed, use kitchen twine or skewers to secure the neck and cavity openings. This will help prevent the stuffing from falling out during cooking. Trussing the turkey will be discussed in more detail later in the article.
If there is any excess stuffing, you can place it in a separate baking dish and cook it alongside the turkey for a delicious side dish.
Trussing the Turkey
Trussing is the process of securing the turkey’s legs and wings to ensure even cooking and a beautiful presentation. Trussing helps to maintain the shape of the turkey, prevents the wings and legs from drying out, and promotes more even cooking throughout the bird. With the right tools and materials, trussing can be a simple yet effective technique.
Why trussing is important
Trussing a turkey before roasting has several benefits. First, it helps the turkey retain its shape, resulting in a more aesthetically pleasing presentation when it’s time to carve and serve the bird. Trussing also helps to prevent the wings and legs from cooking too quickly, which can result in dry, overcooked meat.
By securing the wings and legs close to the body, trussing helps to create a more compact shape, allowing for more even cooking. This ensures that the breast meat doesn’t dry out while waiting for the thigh and leg meat to reach the proper temperature. Overall, trussing contributes to a more evenly cooked, juicier turkey.
Tools and materials for trussing
To truss a turkey, you’ll only need a few simple tools and materials:
- Kitchen twine or butcher’s string: This will be used to tie the turkey’s legs and secure the wings.
- Scissors: You may need to cut the twine to the desired length.
Step-by-step trussing process
Here’s a step-by-step guide to trussing a turkey:
- Take a length of kitchen twine, about 3 feet, and cut it from the spool using scissors.
- Place the turkey on a flat surface, breast-side up, with the legs facing towards you.
- Cross the legs by bending one leg at the knee joint and pulling it towards the cavity of the turkey. Cross the other leg over it, and adjust until the legs are even.
- Take the twine and loop it under the crossed legs, pulling it tight to secure them in place.
- Bring the ends of the twine up towards the turkey’s neck, positioning them so that they are parallel to each other.
- Bring the twine under the wing nearest to you, pulling it tight against the turkey’s body. Repeat this step with the other wing, ensuring that both wings are securely held against the turkey.
- Tie the two ends of the twine together in a knot, securing the wings in place and completing the trussing process.
Alternatives to trussing
If you prefer not to truss your turkey, there are alternatives to achieve similar results. One option is to simply tuck the wings under the body of the turkey. This helps to prevent the wings from drying out while allowing the turkey to maintain a more compact shape.
Another alternative is to use aluminum foil to cover the turkey’s wings and drumsticks during cooking. This can help prevent them from getting too dry or overcooking. Simply fold a piece of foil around each wing and drumstick, securing it loosely. Make sure to remove the foil for the last 30 minutes of cooking to allow for browning.

Preparing the Roasting Pan
The roasting pan plays a crucial role in the cooking process, providing a sturdy base for the turkey and aiding in the distribution of heat. Preparing the roasting pan correctly can enhance the flavors of the turkey and make the cooking process more efficient.
Choosing the right roasting pan
When selecting a roasting pan, opt for one that is large enough to accommodate your turkey comfortably. A pan that is too small can result in overcrowding and uneven cooking. Look for a pan with low sides and sturdy handles that can withstand the weight of the turkey.
Roasting pans come in different materials, such as stainless steel, nonstick, or enameled cast iron. Each material has its advantages and disadvantages. Stainless steel pans are durable and distribute heat evenly, but they can be prone to sticking. Nonstick pans are convenient for easy cleanup but may not provide the same even heat distribution. Enameled cast iron pans offer excellent heat retention but can be quite heavy.
Ultimately, choose a roasting pan that suits your cooking style and preferences.
Adding flavor with aromatics
Aromatics are ingredients that add depth and complexity to the flavor of the turkey. They often consist of vegetables, herbs, and spices that are placed in the roasting pan to infuse the bird with their fragrant essences.
Common aromatics include onions, carrots, celery, garlic, and fresh herbs like rosemary, thyme, and sage. These ingredients not only enhance the flavor of the turkey but also contribute to the savory aroma that will fill your kitchen.
To add aromatics to your roasting pan, simply scatter them across the bottom before placing the turkey on top. You can also stuff the cavity of the bird with additional aromatics for even more flavor infusion.
Preheating the roasting pan
Preheating the roasting pan is an important step to ensure even cooking and optimal browning of the turkey. Placing the bird in a hot pan promotes caramelization, resulting in a crispy, golden skin.
To preheat the roasting pan, simply place it in the oven while it preheats. Follow the oven’s instructions for the desired temperature.
It’s important to note that if you choose to use a glass or ceramic roasting pan, it’s best to avoid preheating it to prevent it from cracking due to the sudden change in temperature. In this case, you can skip the preheating step and place the turkey directly into the cool pan.
Placing the turkey on a rack
Using a rack in your roasting pan has several benefits. Elevating the turkey off the bottom of the pan allows for better airflow, resulting in more even cooking. It also prevents the turkey from sitting in its own juices, which can lead to soggy skin.
If your roasting pan doesn’t come with a rack, you can easily create one using aluminum foil. Simply crumple up several sheets of foil into thick ropes and form a cross shape on the bottom of the pan. Place the turkey on top of the foil rack, positioning it so that it is evenly supported.
Cooking Techniques
Once the preparation is complete, it’s time to move on to the cooking techniques that will ensure a perfectly roasted turkey. Paying attention to cooking temperature, determining cooking time, basting, and using a meat thermometer are all key factors in achieving a delicious result.
Using the correct cooking temperature
Cooking a turkey at the correct temperature is essential for both food safety and achieving tender, moist meat. The USDA recommends cooking a turkey to an internal temperature of 165°F (74°C) to ensure it is safe to eat.
For the best results, it’s important to follow a cooking temperature schedule that allows the turkey to cook evenly. Most recipes suggest starting with high heat to sear the skin, then reducing the temperature to allow for a slower and more controlled cooking process.
A general guideline is to start the turkey at 425°F (220°C) for the first 30 minutes, then reduce the temperature to 325°F (165°C) for the remaining cooking time. However, cooking times and temperatures may vary depending on the size of your turkey, so it’s always best to consult a reliable recipe.
Determining cooking time
The cooking time of a turkey depends on its weight and the cooking temperature used. A general rule of thumb is to calculate about 15-20 minutes of cooking time per pound of turkey. However, it’s essential to use a meat thermometer to ensure that the turkey reaches the correct internal temperature before considering it done.
To determine the exact cooking time for your turkey, consult a reliable recipe or use a cooking time chart based on the weight of your bird. Keep in mind that these estimations are just a starting point and can be affected by factors such as oven temperature variations and the number of times the oven door is opened.
Basting the turkey
Basting is the process of spooning the pan juices over the turkey during the cooking process. Basting helps to keep the turkey moist and adds flavor to the skin. However, there is some debate among cooks as to whether basting is truly necessary or if it leads to a drier bird.
Proponents of basting argue that it contributes to a beautiful, golden brown skin and adds flavor. They believe that basting can help keep the surface of the turkey from drying out during roasting.
On the other hand, those who prefer not to baste believe that the constant opening of the oven door can disrupt the cooking process and lead to a longer cooking time. They argue that the occasional addition of melted butter or other fat to the turkey’s skin before cooking is sufficient to achieve a flavorful result.
Whether you decide to baste your turkey or not, it’s important to remember that frequent basting can lead to longer cooking times and less crispy skin. If you do choose to baste, aim to do so quickly and efficiently to minimize heat loss from the oven.
Using a meat thermometer to check doneness
Using a meat thermometer is the most accurate way to determine if your turkey is cooked to perfection. Insert the thermometer probe into the thickest part of the turkey’s thigh without touching the bone. The internal temperature should reach a safe minimum of 165°F (74°C) to ensure that the turkey is fully cooked.
It’s crucial to check the temperature in multiple places to ensure that different parts of the turkey are cooked equally. Insert the thermometer into the breast and make sure it also reaches 165°F (74°C) before considering the turkey done.
A digital instant-read thermometer is the most convenient option, as it provides fast and accurate temperature readings. Keep in mind that oven-safe meat thermometers can also be used, but they require opening the oven door to check the temperature, which can lead to longer cooking times.
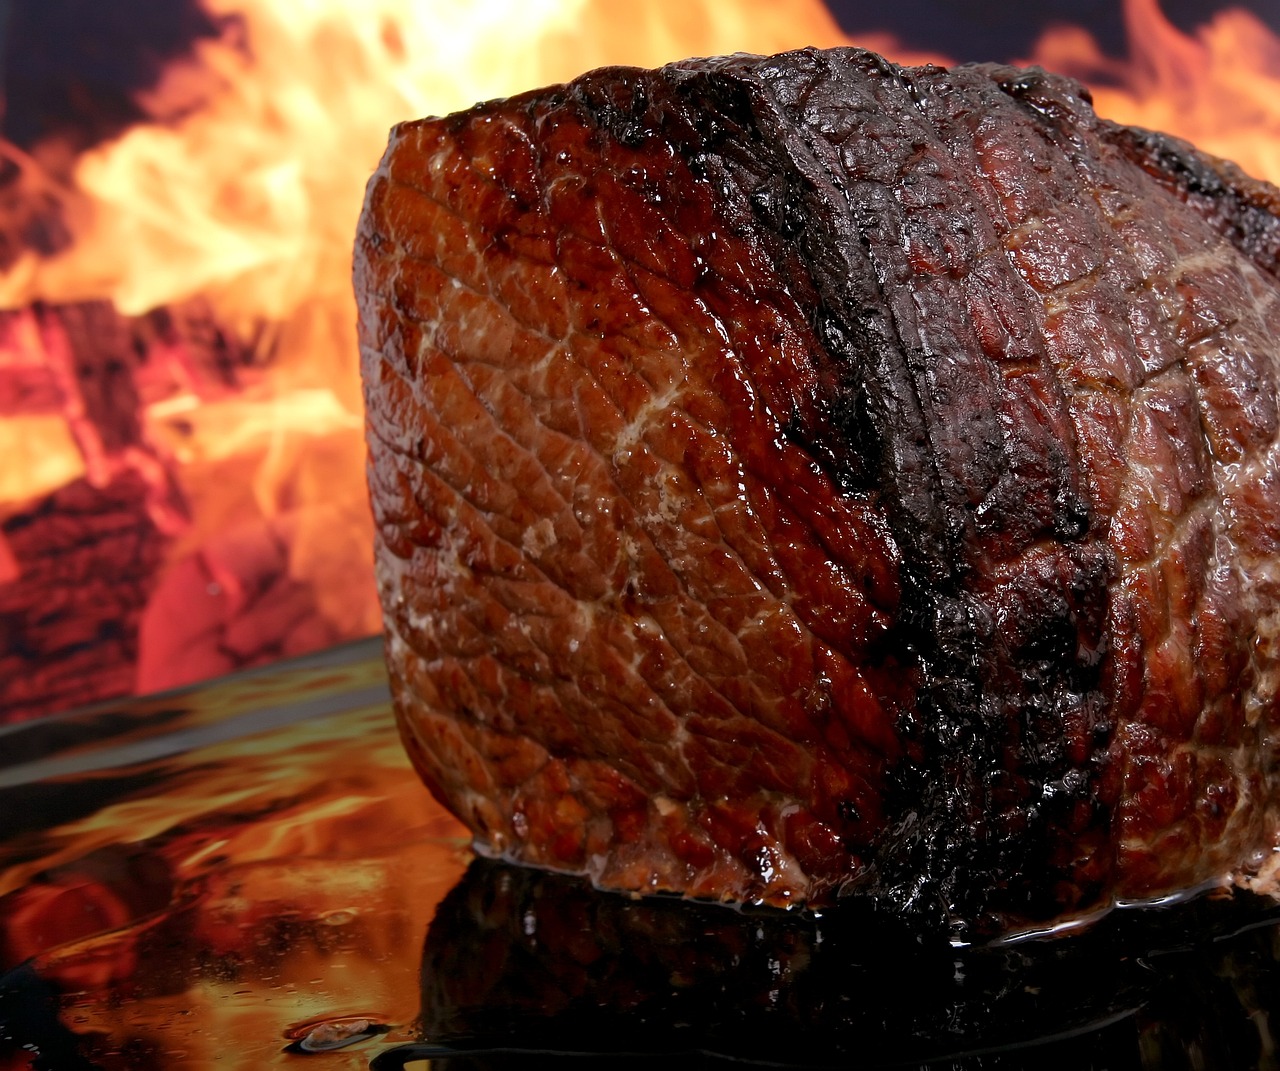
The Perfect Roasting Process
Achieving a perfectly roasted turkey requires following a specific process that involves different cooking techniques and temperature adjustments. Let’s walk through the steps that will help you achieve tender, juicy meat and a beautiful, crispy skin.
Initial high-temperature searing
The first step in the perfect roasting process is to start with high heat to sear the skin and lock in the juices. Preheat the oven to 425°F (220°C) and place the prepared turkey on a rack in the roasting pan.
Roast the turkey at this high temperature for the first 30 minutes to promote browning and crisping of the skin. This initial blast of heat will help create a flavorful crust and set the stage for a beautifully roasted bird.
Reducing the temperature for even cooking
After the initial searing, reduce the oven temperature to 325°F (165°C) for the remaining cooking time. This lower temperature ensures that the turkey cooks evenly and allows the heat to reach the center of the bird without overcooking the outer layers.
Continue roasting the turkey until it reaches an internal temperature of 165°F (74°C). This can vary depending on the size of your turkey, so refer to a reliable recipe or cooking time chart for more precise guidance.
Turning the turkey for even browning
To achieve even browning and a beautiful golden color, it’s a good idea to turn the turkey during the roasting process. This ensures that all sides of the bird are exposed to the oven’s heat, resulting in a more uniform appearance.
To turn the turkey, use oven mitts or silicone gloves to protect your hands from the heat. Carefully rotate the turkey 180 degrees so that the side that was facing the back of the oven is now facing forward. This simple step will help ensure that both sides of the turkey brown evenly.
Tent with foil if necessary
While roasting, it’s common for the skin to brown before the meat has reached the desired internal temperature. To prevent the skin from becoming too dark or burned, you can tent the turkey with aluminum foil.
About halfway through the cooking time, check the color of the skin. If it’s browning too quickly, place a tent of foil loosely over the turkey. This will shield the skin from direct heat, allowing it to continue cooking without becoming overly dark. Remember to remove the foil for the last 30 minutes if you want a crispy skin.
Resting and Carving
Resting the turkey after cooking is a crucial step that many home cooks overlook. Allowing the turkey to rest before carving allows the juices to redistribute and the meat to become more tender and flavorful. Here’s how to rest and carve your Thanksgiving masterpiece.
Resting the cooked turkey
Once the turkey reaches the desired internal temperature, remove it from the oven and tent it loosely with foil. Allow the turkey to rest for at least 20-30 minutes before carving. This resting period allows the fibers of the meat to relax, resulting in juicy, tender turkey.
During the resting time, it’s important to keep the turkey warm. You can place it in a warm spot in the kitchen or cover it with additional layers of foil to retain heat. Avoid leaving the turkey out at room temperature for too long, as this can promote bacterial growth.
Carving techniques for a beautiful presentation
Carving a turkey can be intimidating, but with the right techniques, it becomes a simple and rewarding task. Follow these steps to carve your turkey and achieve a beautiful presentation:
- Start by removing the twine or skewers used for trussing the turkey. This will free up the legs and wings for easier carving.
- Using a sharp carving knife, make a horizontal cut just above the leg joint to separate the thigh from the breast. Repeat on the other side.
- Bend the leg away from the body and cut through the joint to remove the thigh. Repeat on the other side.
- Locate the joint where the drumstick meets the thigh. Cut through the joint to separate the drumstick from the thigh. Repeat on the other side.
- For the breast, make a vertical cut along the breastbone, running the knife close to the rib cage.
- Once the knife reaches the bottom of the breastbone, gently push the breast away from the bone, using the tip of the knife to guide the meat away.
- Continue cutting the breast into thin slices until you reach the bottom. Repeat on the other side.
- Arrange the carved pieces on a platter, making sure to display both white and dark meat. Garnish with fresh herbs or other decorative elements for an elegant touch.
Serving suggestions
Once the turkey is expertly carved, it’s time to serve it and enjoy the fruits of your labor. Consider serving your perfectly roasted turkey with classic Thanksgiving sides like mashed potatoes, cranberry sauce, green beans, and homemade gravy. This traditional combination is sure to delight your guests and create a memorable holiday feast.
Remember that presentation plays a significant role in the overall dining experience. Arrange the carved turkey slices neatly on a platter and garnish with fresh herbs for a touch of elegance. Encourage your guests to help themselves and enjoy the flavors of the perfectly roasted turkey.
Common Mistakes to Avoid
Roasting a turkey can be challenging, even for the most experienced cooks. Avoiding common pitfalls and mistakes is essential to ensure a successful Thanksgiving feast. Let’s go through some of the most common blunders and how to avoid them.
Overcooking or undercooking
One of the most common mistakes when roasting a turkey is overcooking or undercooking the meat. Overcooked turkey can be dry and tough, while undercooked turkey can be unsafe to eat.
Using a meat thermometer is the best way to avoid this mistake. Regularly check the turkey’s internal temperature and remove it from the oven when it reaches 165°F (74°C), ensuring that the thermometer is not touching the bone.
Skipping the brining process
Brining is a crucial step for achieving a juicy and flavorful turkey. Skipping this process can result in a drier bird with less developed flavors.
To ensure optimal results, plan ahead and allow enough time for the turkey to brine. Follow a reliable brine recipe and adapt it to suit your personal preferences.
Opening the oven too frequently
Opening the oven door too frequently during the cooking process can lead to temperature fluctuations and uneven cooking. Each time the oven door is opened, heat escapes, and the oven needs time to regain the desired temperature.
Avoid unnecessary oven openings and resist the temptation to constantly check on the turkey’s progress. Instead, rely on a trusted meat thermometer to determine when the turkey is done.
Not allowing enough resting time
Resting the turkey after cooking is key to achieving tender, juicy meat. Allowing the turkey to rest for at least 20-30 minutes before carving allows the juices to redistribute and the meat to become more tender.
Avoid the temptation to immediately carve the turkey once it comes out of the oven. Give it the proper resting time it needs to ensure a moist and flavorful result.
Frequently Asked Questions
Roasting a turkey can raise many questions, especially for those new to the process. Here are answers to some frequently asked questions that can help clarify any doubts you may have.
How long does it take to roast a turkey?
The cooking time of a turkey depends on its weight and the cooking temperature used. As a general guideline, calculate about 15-20 minutes of cooking time per pound of turkey. However, it’s crucial to use a meat thermometer to ensure that the turkey reaches the correct internal temperature of 165°F (74°C) before considering it done.
What is the recommended internal temperature?
The USDA recommends cooking a turkey to an internal temperature of 165°F (74°C) to ensure that it is safe to eat. Use a meat thermometer to check the temperature in multiple places, avoiding contact with bones to get an accurate reading.
Can I stuff the turkey ahead of time?
Stuffing the turkey ahead of time is not recommended for food safety reasons. The moisture from the stuffing combined with the warm cavity of the turkey creates an ideal environment for bacterial growth. To minimize the risk of foodborne illness, it’s best to stuff the turkey just before roasting.
What if I don’t have a roasting pan?
If you don’t have a roasting pan, there are alternatives you can use. A sturdy, oven-safe baking dish or a disposable aluminum foil roasting pan can work well. Make sure the chosen vessel is large enough to accommodate the turkey comfortably and has enough depth to catch any drippings. Remember to adjust the cooking time accordingly based on the size and material of the pan used.
Roasting a Thanksgiving turkey is a labor of love that requires careful preparation, attention to detail, and the right techniques. By following the steps outlined in this comprehensive guide, you can confidently roast a turkey that will be the star of your holiday table. From choosing the right turkey and seasoning it to perfection, to trussing, roasting, and carving, each step is crucial for achieving a delectable outcome. Avoiding common mistakes and understanding the importance of resting and carving is equally important in creating a memorable dining experience for your loved ones. So roll up your sleeves, gather your ingredients, and embark on the journey of perfectly roasting a Thanksgiving turkey that will leave your guests asking for seconds. Happy roasting!