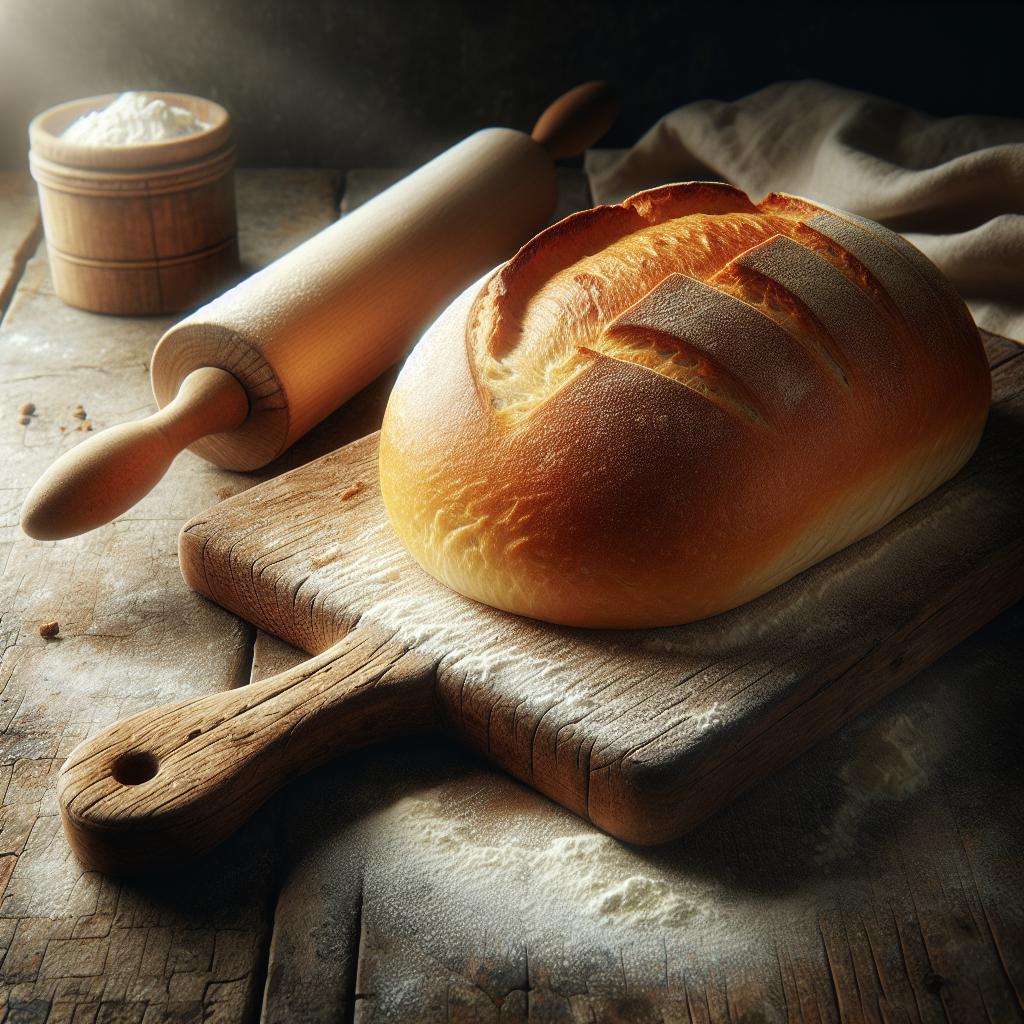
Imagine waking up to the warm, comforting aroma of freshly baked bread wafting through your home. With bread machines, this can become a delightful reality. Tastepan.com is here to introduce you to the joy of bread machines – a revolutionary kitchen gadget that allows you to effortlessly create homemade loaves of bread. From classic white bread to hearty whole wheat and even artisanal creations, these machines are a game-changer for bread enthusiasts and home cooks alike. Say goodbye to store-bought loaves and hello to the satisfaction of baking your very own bread, right in the comfort of your own kitchen.

Choosing the Right Bread Machine
Bread machines have become a popular addition to many kitchens, allowing you to enjoy fresh, homemade bread without the hassle of traditional baking methods. If you’re considering purchasing a bread machine, there are a few key factors to consider to ensure you choose the right one for your needs.
Capacity
One of the first things to consider when choosing a bread machine is its capacity. The capacity determines how much dough the machine can handle, which is important if you have a large family or enjoy baking for gatherings. Smaller machines typically have a capacity of around 1-pound loaves, while larger models can handle 2-pound or even 3-pound loaves.
Programs and Settings
The programs and settings available on a bread machine can greatly affect the variety of bread you can make. Look for machines that offer a wide range of programs, including basic white bread, whole wheat bread, and gluten-free options. Additionally, consider machines that have settings for different crust colors, kneading options, and even the ability to make dough for pizza or pasta.
Size and Design
The size and design of a bread machine may seem like minor details, but they can greatly impact your overall experience. Consider the available counter space in your kitchen and choose a machine that will fit comfortably. Additionally, look for machines with easy-to-use controls and a clear viewing window, allowing you to monitor the baking process without opening the machine and disrupting the baking cycle.
Benefits of Using a Bread Machine
Now that you understand what to look for when purchasing a bread machine, let’s explore the benefits that come with using one in your kitchen.
Convenience
One of the greatest benefits of using a bread machine is the convenience it offers. Simply add the ingredients, select the desired program, and let the machine do the work. You can wake up to the aroma of freshly baked bread or come home after a long day to a warm loaf waiting for you. With a bread machine, you can enjoy the pleasure of homemade bread without the time-consuming process of traditional baking.
Cost Savings
Another appealing aspect of using a bread machine is the cost savings it can provide. Buying pre-packaged bread can add up over time, especially if you prefer specialty or artisan loaves. By making your own bread at home, you can significantly reduce your grocery expenses, while also having control over the quality of the ingredients you use. Plus, it’s a fun and rewarding way to save money and enjoy delicious bread at the same time.
Healthier Options
When you bake your own bread, you have full control over the ingredients you use. This allows you to create healthier versions of your favorite bread recipes, eliminating preservatives and unnecessary additives. You can experiment with different types of flour, add nutritious ingredients like seeds or whole grains, and even personalize the flavors to suit your dietary preferences. Using a bread machine empowers you to make healthier choices for you and your family.

Understanding Bread Machine Settings
To make the most out of your bread machine, it’s important to understand the different settings and programs it offers. Let’s take a closer look at some of the most common settings you’ll find on a bread machine.
Basic/White Bread
The basic or white bread setting is the most commonly used program on a bread machine. It is designed to create a classic loaf with a soft and fluffy texture. This setting typically involves a single rise and a standard baking time, resulting in a traditional white bread that is perfect for everyday sandwiches or toast.
Whole Wheat Bread
The whole wheat bread setting is specifically designed for recipes that use whole wheat flour instead of traditional all-purpose flour. Whole wheat bread requires a longer rising time and a higher baking temperature to achieve a hearty, dense loaf with a nutty flavor. This setting ensures that your whole wheat bread is perfectly baked, retaining its moisture and avoiding a heavy or dense texture.
Gluten-Free Bread
For those with gluten sensitivities or dietary restrictions, a gluten-free bread setting is a game-changer. This setting is specifically designed to handle the unique challenges of gluten-free baking, such as the lack of gluten elasticity. By using specialty gluten-free flours and carefully calibrated baking temperatures, this setting allows you to enjoy delicious gluten-free bread that rivals its gluten-filled counterparts.
Tips for Successful Bread Machine Baking
While bread machines are incredibly convenient, there are a few tips and tricks to keep in mind to ensure successful baking results every time.
Follow the Recipe
When using a bread machine, it’s essential to follow the recipe provided with the machine or use trusted bread machine recipes. Bread machine recipes are specifically created with the machine’s functions in mind, ensuring that the ingredients and instructions are accurate for the best results. It’s tempting to experiment and add your own personal touch, but it’s best to save those creative endeavors for when you’re more familiar with the machine.
Measure Ingredients Accurately
Accurate measurement of ingredients is key to successful bread machine baking. Invest in a good kitchen scale to weigh your ingredients, especially when measuring flour. Baking is a science, and even a slight deviation in ingredient quantities can greatly affect the final result. By measuring accurately, you can ensure consistent and delicious loaves every time.
Use the Right Yeast
Using the right type of yeast is crucial for successful bread machine baking. Most bread machine recipes call for instant yeast, also known as bread machine yeast. This type of yeast doesn’t require proofing and can be added directly to the dry ingredients. Using the right yeast ensures proper fermentation and a well-risen loaf. Make sure to check the recipe and use the recommended yeast for the best results.

Experimenting with Flavors and Ingredients
While bread machines offer convenience and consistent results, they also allow you to get creative in the kitchen. Here are a few ideas for experimenting with flavors and ingredients in your bread machine recipes.
Adding Herbs and Spices
Enhance the flavors of your homemade bread by adding herbs and spices. Fresh or dried herbs, such as rosemary, thyme, or basil, can impart a delightful aroma and taste to your loaf. Spices like cinnamon, nutmeg, or cardamom can add warmth and depth to sweet bread varieties. Don’t be afraid to get creative and tailor the flavors to suit your preferences.
Incorporating Different Flours
Expand your baking horizons by incorporating different types of flours into your bread machine recipes. Experiment with whole wheat flour, rye flour, or even gluten-free flours to create unique and flavorful loaves. Different flours can result in variations in texture, flavor, and appearance, allowing you to discover new and exciting bread options.
Mixing in Nuts and Seeds
Add a delightful crunch and a boost of nutrition to your homemade bread by mixing in nuts and seeds. From sunflower seeds and flaxseeds to walnuts and almonds, the possibilities are endless. Not only do nuts and seeds add texture and flavor, but they also provide essential nutrients like healthy fats and protein. Experiment with different combinations to find your favorite nutty or seedy bread.
Troubleshooting Common Bread Machine Issues
While bread machines make baking homemade bread a breeze, there may still be times when you encounter common issues. Here are some troubleshooting tips for the most common bread machine problems.
Dough Sticking to the Sides
If you find that your dough is sticking to the sides of the bread pan during the mixing or kneading process, it’s important to ensure that the pan is properly greased. Applying a thin layer of cooking spray or butter to the inside of the pan before adding the ingredients can help prevent the dough from sticking. Additionally, using the right amount of flour and liquids as specified in the recipe can help achieve the right consistency.
Dense or Sunken Loaves
Dense or sunken loaves can be a result of several factors. Firstly, check the expiration date of your yeast to ensure it’s still active. Using expired or old yeast can result in poor rising and lead to a dense loaf. Secondly, make sure you’re using the right amount of yeast for the recipe. Too little yeast may result in a loaf that doesn’t rise properly. Finally, ensure that you’re accurately measuring your ingredients, including flour. Too much flour can result in a heavy loaf.
Unevenly Baked Bread
If you notice that your bread is unevenly baked, with one side being lighter or darker than the other, it may be due to uneven heat distribution in your bread machine. Make sure that the bread pan is properly centered in the machine and that it’s not touching the sides or the top of the machine. Additionally, consider rotating the pan halfway through the baking process to ensure even heat exposure.
Cleaning and Maintenance
Proper cleaning and maintenance of your bread machine are essential for its longevity and optimal performance. Here are some tips for keeping your bread machine clean and in good working order.
Cleaning the Bread Pan
After each use, it’s important to clean the bread pan thoroughly. Remove the pan from the machine and wash it with warm, soapy water. Pay special attention to any residue or crumbs that may have accumulated in the corners or crevices of the pan. Avoid using harsh abrasives or metal utensils that could scratch the pan’s surface.
Removing Excess Flour
Bread machines can sometimes leave behind excess flour after baking. To clean the interior of the machine, use a soft, dry cloth or a small brush to wipe away any loose flour. Be careful not to touch the heating elements or any delicate parts of the machine. If necessary, you can also use a slightly damp cloth to remove stubborn flour residue.
Regular Maintenance Checks
To ensure that your bread machine continues to function properly, it’s important to perform regular maintenance checks. Inspect the paddle or kneading blade for any signs of wear or damage, as a worn blade may not mix or knead the dough properly. Additionally, check the electrical cord for any fraying or damage. If you notice any issues, contact the manufacturer for replacements or repairs.
Bread Machine Recipes
Now that you’re well-versed in the art of bread machine baking, it’s time to try out some delicious recipes. Here are a few classic bread machine recipes to get you started:
Classic White Bread
Ingredients:
- 1 cup water
- 2 tablespoons sugar
- 1 1/2 teaspoons salt
- 2 tablespoons butter
- 3 cups bread flour
- 2 teaspoons instant yeast
Instructions:
- Add all the ingredients to the bread pan in the order recommended by your bread machine’s manufacturer.
- Select the basic/white bread setting and the desired crust color.
- Press start and let the bread machine work its magic.
- Once the bread is finished baking, remove it from the pan and allow it to cool before slicing.
Cinnamon Raisin Bread
Ingredients:
- 1 cup water
- 2 tablespoons vegetable oil
- 2 tablespoons sugar
- 1 1/2 teaspoons salt
- 3 cups bread flour
- 2 teaspoons cinnamon
- 2 teaspoons instant yeast
- 1 cup raisins
Instructions:
- Add all the ingredients, except for the raisins, to the bread pan in the order recommended by your bread machine’s manufacturer.
- Select the sweet bread setting and the desired crust color.
- Add the raisins when the machine beeps, indicating it’s time to add mix-ins.
- Press start and let the bread machine do its thing.
- Enjoy the delightful aroma of cinnamon and raisin filling your kitchen as the bread bakes.
Sunflower Seed Loaf
Ingredients:
- 1 cup water
- 2 tablespoons honey
- 2 tablespoons melted butter
- 1 1/2 teaspoons salt
- 2 cups bread flour
- 1 cup whole wheat flour
- 2 teaspoons instant yeast
- 1/2 cup sunflower seeds
Instructions:
- Add all the ingredients, except for the sunflower seeds, to the bread pan in the order recommended by your bread machine’s manufacturer.
- Select the whole wheat bread setting and the desired crust color.
- Add the sunflower seeds when the machine beeps, indicating it’s time to add mix-ins.
- Press start and let the bread machine work its magic.
- Prepare to enjoy a hearty and flavorful sunflower seed loaf.
Storing and Freezing Homemade Bread
Once you’ve baked your delicious homemade bread, you’ll want to ensure it stays fresh for as long as possible. Here are some tips for storing and freezing your bread.
Proper Storage Techniques
To keep your bread fresh, it’s important to store it correctly. Allow the bread to cool completely before storing it. Once cooled, place it in a bread box or a paper bag to help retain moisture without causing the crust to become soggy. If you prefer a softer crust, you can wrap the loaf in a clean kitchen towel or plastic wrap. Avoid storing bread in the refrigerator, as it can dry out the bread and accelerate staling.
Freezing and Thawing Tips
If you have more bread than you can consume within a few days, freezing is a great option. To freeze your bread, wait until it has completely cooled and then place it in a freezer-safe bag or airtight container. For sliced bread, consider placing parchment paper between each slice to prevent them from sticking together. When you’re ready to enjoy your frozen bread, simply remove it from the freezer and let it thaw at room temperature. You can also reheat individual slices in a toaster or a toaster oven for a fresh-from-the-oven experience.
Reheating Methods
If you prefer your bread slightly warm, there are a few methods you can use to reheat it. To reheat a whole loaf, preheat your oven to 350°F (175°C). Wrap the bread in aluminum foil and place it on a baking sheet. Warm the loaf in the oven for about 10-15 minutes, or until it reaches your desired temperature. For individual slices, simply toast them in a toaster or a toaster oven until they are warm and crispy.
Conclusion
Choosing the right bread machine can greatly enhance your baking experience and bring the joy of fresh, homemade bread to your kitchen. By considering factors like capacity, programs and settings, and size and design, you can find the perfect bread machine to meet your needs. Once you have your bread machine, you can enjoy the benefits of convenience, cost savings, and the ability to create healthier bread options. Understanding the different settings on your bread machine and following a few tips for successful baking will ensure that your loaves turn out perfectly every time. And with the ability to experiment with flavors and ingredients, troubleshoot common issues, and care for your bread machine properly, you can embark on a delicious bread-making journey. So, start exploring the wonderful world of bread machine baking and enjoy the satisfaction of fresh loaves at home. Happy baking!